Wednesday, July 28, 2010

Replacement Placement

Body Panel Test Placement

Though I've presented some of these images before, I wanted to present them as a set. One of the concerns with replacement panels is the fear that they may not fit just right or be cheaply made, but I don't think I have any of those problems here. Well enough chatter and on with the show.

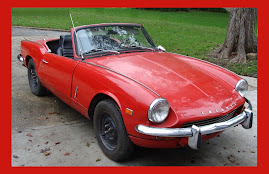
Passenger Side Fender

This piece went on without a hitch and looks to be perfect placement. Hiding underneath is some rotted out metal that will have to be reconstructed in the wheel well.

Driver Side Fender
This piece simply refuses to sit correctly, but is a pretty good fit. Below, it will need some metal replacement in the wheel well though not as extreme as the other side.

Passenger Side Inner Sill

It took me a while to figure out how this piece was to fit into the location. I flipped it around 3-4 times before realizing I needed to point the diagonal part to the rear of the car. once I got that figured out it went in really smoothly. The remaining sill line had to be pounded back into a straight line to match up with the inner sill after the manhandling I had to do removing the old metal.

Driver Side Inner Sill
After figuring out the placement with the other side, this was easy to place. I had less distortion from the removal than the other side, which is good as the metal here was in far worse shape. It will likely have to be patched from the inside as well.

Passenger Side Rocker Panel

The rocker panel itself is a good fit, though I will have to remove the piece in the middle blocking it from seating in fully. The shape is perfect fit. It will need a little more TLC on the weld lines before it can be placed.

Driver Side Rocker Panel
Another good fit, though like before, the middle piece is blocking a true fitting. With the damaged metal, It will likely have to be braced from the inside.

End Caps
The end caps seem to be impossible to get placed in a manor that I can take a picture. They too are a little confusing in orientation but should make a good fit assuming I got all the old weld line out of the way.

Overall, the panels were an excellent buy and definitely worth replacing. We'll see if my attitude changes after the welding to get them fixed in place is completed.

Tuesday, July 27, 2010

Forth Cut and Rust Removal v2.0

Front

It's sorta funny sometimes... I intended to take pictures at each and every step of the process of fixing up this car. And I constantly find that I forgot to take a picture of this or that. Luckily, for most things I have overall shots I can crop and get some sorta photo evidence. Well, here is an obvious case of a missed shot. I intended this to be two separate postings, one showing the finishing cuts on the rocker panels, and another of the rust removal. Well, lets just say it's a combo meal and we can't ring it up separate!

Overall I am happy with this section as it is relatively solid and the rust through areas are limited to behind the replacement pan the PO put in.

Middle

Well now that I have said good things about the front section comes the letdown. The sill area on the driver side is in pretty rotten shape. Several areas of complete rust though the metal, some of which is easily patched, some of it not so easily patched. Some of the bottom weld seam is rusted through. I hope that the welder guy can get this area straight.

Rear

Though not nearly as bad as the other side, it still has some rusted through issues on the fender well. I still can't quite get the fender repair to seat as well as the other side though. I am still tweaking the fit.

Driver Side Overall
Overall, I think the rocker panels could have been a lot worse than they really are. All bare metal will be sprayed black to protect it from the ravishes of rust. Weld through primer will be used on the weld areas and hopefully it will keep the Demon Rust at bay for several more years...

Monday, July 26, 2010

Third Cut

Front Driver Side
Moving on up and over to the driver side, I started cutting. I believe I did a much better job this time, notice the minimal ripping at the welds. I left the end cap for another day. The rust damage on this side seems similar to the other, though apparently, this side was replaced in the past as well, though it didn't hold up all that well. A patch to the end cap and a minimal amount of bondo was present. The cut-off wheel definitely has a strange feel to it when slicing through bondo and metal.

Middle Driver Side
I am really concerned about the structural integrity of the remaining piece... I am considering bracing it from the inside before the new inner sill and rocker panel gets installed. The rust is definately worse here than on the other side of the car.
Rear Driver Side
In much better shape than the opposite side, though it will also need some reconstructive work. I am concerned with the wiring harness being so close to where the welding will take place... I plan to securely tape it down inside to hopefully prevent it from getting cooked.

Flintstones, meet the Flintstones
With the rocker panels removed on both side, and the wooden supports in place, The car looks so much like a Flintstones mobile. The only thing that would make it more so would be if the floor panels were not in place.

Test fitting the repair panel
After the first repair panel fit like it was made to be there, I was hoping to have similar results on this side of the car. Apparently, I wasn't going to be that lucky. It still fits pretty well and hopefully a few tweaks will get it to fit perfectly.

I'm still awaiting the guy to prep and weld the passenger side and I still need to remove the end cap. It's busy at the shop but I hope that he will fit it into his schedule. The more work I get done equals the less he will have to do, and therefore the less it will cost me.

Friday, July 23, 2010

Rust Removal v1.0

The doldrums of Summer

Though my postings, err, maybe the lack of postings seems to show signs of no work, some work is actually getting done. Just not much of it. The activities of summer are consuming my spare time, as is work and the never-ending honey-do list. I'll never catch up, stuff just keeps adding on... I am hoping to get one of the workers where my car is to fix the inconsistencies below and weld on the new panels, but the shop is busy. Not that I am complaining, I want his shop to be busy so he can stay in business. Healthy Business = Spitfire has a roof over it's head.

Front Rust removal

Suffering considerably from rot associated with the floor-pan issues, This area may need to be patched. I also need to work on the areas I butchered in removing the old metal. You live and you learn, and move on. Worst case bad metal will be cut out and new donor metal grafted in...

Middle Rust Removal
The sill area seems not to be too bad, though there is some rust holes in the sill itself. I'm really not that happy with the sill remaining and may patch over the worst of the rusted through area for additional support. I'm scared that cutting metal out to graft may hurt the structural integrity of the body. There is a new inner sill to be placed, combined with the rocker panel I hope not to have to mess with the sill too much.

Rear Rust Removal

This area has suffered badly with rust. I will have to fabricate the chunk missing from the back of this piece. It's pretty beat up but the inner compartment is solid in this area so all should be well if I can properly metal off the area and seal it.

All in all, the rust damage is worse than I though, though, it always is like that. It shouldn't be to difficult to get it whipped into a working shape. I'm not going for perfect and pristine, just solid and functional. Also, my friend is in the auto collision business and has a constantly replenishing source of donor metal for experimentation and use.