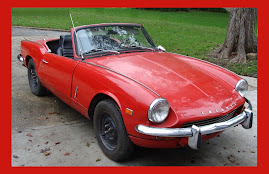
A combination of work, personal life, and size of the next task has led to a long period of progress stagnation, the doldrums. I've been working heavily with the British Motoring Club of New Orleans, we had another successful car show. I've been re-vamping the club website, and is currently acting Newsletter Editor.
The Company I work for is selling a division, leading to job jitters. And to add to it, I need to strip the car and prep for paint, something I've never done and need to learn. Fear not, I still think of the car often and have been planning and working and assembling stuff for the next stages.
I'm in the process of cleaning out the shed, my primary workspace. It had gotten so cluttered, I didn't have any more room to work. I've cleaned it out, and I am prepping to re-organize the parts and begin anew.
Once I get it back in gear, I will be updating this blog with progress.
Tuesday, June 7, 2011
Monday, January 17, 2011
Welding 302
Ahh, all my minor successes has led me to one big test. The passenger side rocker panel. Prepped in the same way as before (This update brought to you by the Redundant Redundancy Department).
 When I proceeded to stripping it, everything was going well... too well... The wheel grabbed at the metal and ran off the other side and bushed right on my left hand! It looked like 1000 little scratch marks, each about 1 inch long. The cuts were not very deep and the damage was more embarrassing then dangerous. A simple pair of gloves, more attention to hand placement, had my father taught me nothing? Well, it served as a reminder that you always have to be vigilant and the most mundane tasks can cause serious injury. Consider me reminded.
And thus it begins. In test fitting the rocker, something definitely wasn't right. It looks like the replacement panel is a bit too tall on the top and a bit to short on the bottom, like it slipped while stamping it. Drat! And this is the piece I've banged around a bit. I can force the top to scrunch down but it pushes the bottom to the point I can't weld it with the short line. Measuring from pre-stamped holes it's definitely a bit off. Looking at it, if I could weld the top of it pushed down, I can force the bottom up to meet the weld line, but wow, how to juggle all that while trying to weld, trying not to burn through the car and burn through me as well.
 I remembered in one of the tool boxes at the shop I found a pair of pliers that simply refused to open more than a few sheets of metal wide. Just perfect for my plan! I would use the pliers and the weight of the car to press it down for welding. It was a bit short but it worked spectacularly. Put the pliers in place at an angle, wedge my leg and thigh under the car and lift until I could get the pliers straight up. Weld two holes, lift again with thighs and reposition prop. It was just enough to press it tightly to the weld line, but not enough to damage the metal. Once prop-ed, I could wiggle the metal to make a good fit and weld away. It made for really long slow progress, but it was progress!

Once I got to the front bit under the bonnet, I realized how hard it was to bend back the metal I had mangled so much ripping off the old metal. Process was beat back old metal from the inside, with body-working hammer and bar, until the inside metal was flush with the new metal. Weld one hole. Repeat, again and again and again. Learned my lesson. Yes metal can be repaired, it just takes alot of time and effort. Much better not to mess up the metal in the first place.
 Overall, I an happy with the results, even if this side was a bit more problematic from the start. The lines all meet up well and prepwork needs to be done for painting now.

Line-weld points are taped over for later welding. Both sides replaced, though critical time was wasted waiting for someone to do it. Need to get the line welds done now...
Punched, but not stripped or primed.
 When I proceeded to stripping it, everything was going well... too well... The wheel grabbed at the metal and ran off the other side and bushed right on my left hand! It looked like 1000 little scratch marks, each about 1 inch long. The cuts were not very deep and the damage was more embarrassing then dangerous. A simple pair of gloves, more attention to hand placement, had my father taught me nothing? Well, it served as a reminder that you always have to be vigilant and the most mundane tasks can cause serious injury. Consider me reminded.
And thus it begins. In test fitting the rocker, something definitely wasn't right. It looks like the replacement panel is a bit too tall on the top and a bit to short on the bottom, like it slipped while stamping it. Drat! And this is the piece I've banged around a bit. I can force the top to scrunch down but it pushes the bottom to the point I can't weld it with the short line. Measuring from pre-stamped holes it's definitely a bit off. Looking at it, if I could weld the top of it pushed down, I can force the bottom up to meet the weld line, but wow, how to juggle all that while trying to weld, trying not to burn through the car and burn through me as well.
The Rig
 I remembered in one of the tool boxes at the shop I found a pair of pliers that simply refused to open more than a few sheets of metal wide. Just perfect for my plan! I would use the pliers and the weight of the car to press it down for welding. It was a bit short but it worked spectacularly. Put the pliers in place at an angle, wedge my leg and thigh under the car and lift until I could get the pliers straight up. Weld two holes, lift again with thighs and reposition prop. It was just enough to press it tightly to the weld line, but not enough to damage the metal. Once prop-ed, I could wiggle the metal to make a good fit and weld away. It made for really long slow progress, but it was progress!
Welding Progress

Once I got to the front bit under the bonnet, I realized how hard it was to bend back the metal I had mangled so much ripping off the old metal. Process was beat back old metal from the inside, with body-working hammer and bar, until the inside metal was flush with the new metal. Weld one hole. Repeat, again and again and again. Learned my lesson. Yes metal can be repaired, it just takes alot of time and effort. Much better not to mess up the metal in the first place.
Ta Da!
 Overall, I an happy with the results, even if this side was a bit more problematic from the start. The lines all meet up well and prepwork needs to be done for painting now.
Taped and prepped for next moves

Line-weld points are taped over for later welding. Both sides replaced, though critical time was wasted waiting for someone to do it. Need to get the line welds done now...
Welding 301
Oh, where does the time go? Christmas plus New Years plus Work = Poor Neglected Spitfire. I'm still commenting on work done last year, about 1 month ago. If I don't start, when will it ever end. On with the show!
After the success of the driver side, I proceeded with the fender repair on the passenger side. Prepped the same as before, punching, stripping, then weld-through priming.

The welding went pretty smooth on this piece and all looks well. Really anticlimactic. Am I finally getting the hang of welding, is it really this easy? We'll see.

I still need to fill the holes and get the top line-welded...
After the success of the driver side, I proceeded with the fender repair on the passenger side. Prepped the same as before, punching, stripping, then weld-through priming.
Punched, Stripped and Primed

The welding went pretty smooth on this piece and all looks well. Really anticlimactic. Am I finally getting the hang of welding, is it really this easy? We'll see.
Patched!

I still need to fill the holes and get the top line-welded...
Subscribe to:
Posts (Atom)