

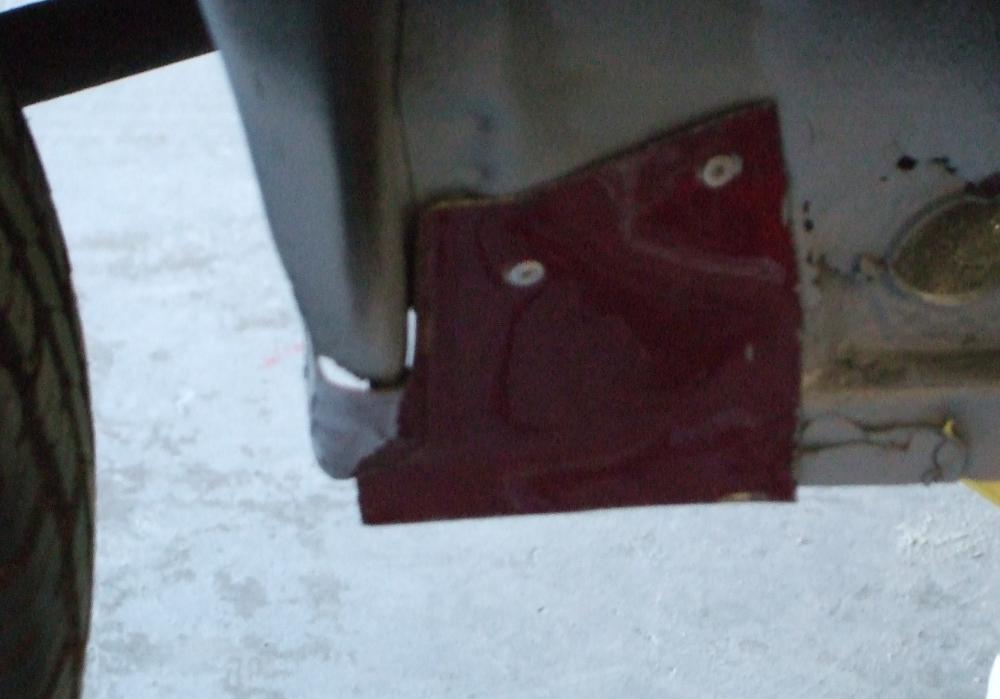
Driver Side Front Patch
 Not very well formed but it will do the job. I couldn't get enough space to put rivets below, so the top will have to do until I can spot weld it in place. It really looks worse than it is, the rotten metal (formerly the bottom pan) is backed by the PO's replacement bottom pan. It is screwed in with self tapping sheet metal screws (ugh ugly) but it seems to be pretty well embedded. I will have to do something about the bottom, as it is continuing to rust and will eventually rust past the replacement pan. After rivetting, the replacement was beaten to get a good close fit and then wire-brushed to get this side to bare metal. After that it was sprayed with weld through primer.
Driver Side Sill Problem
 I though all the sills were in good shape before I gutted the rocker panels, but boy was I wrong. What looked like power rust on this side, after brushing turned out to be paper thin, and hole infused. I do not want to go through the nightmare of replacing it as it is extremely outside of my plans. I decided to take the easy out and place a patch. Much larger than the rusty area to be well away from weakness, I placed the patch.
 Driver Side Sill Patch, cleaned
 I used a piece of slightly curved metal and used the pop rivets to bend it slightly out of it's curve on the hope of giving it a little bit of extra strength. Wire-Brushed the paint off of it and primed it with weld through primer. After putting it in, the sill did appear to be much more solid.
Driver Side Fender Patch
 Overall, this one went in pretty easily, though I did have to put one rivet in, then bang the place for the second rivet down to get it to mate up nicely. I really should have made it a bit taller and cover more, but I didn't and will have to cover the back with bondo to fill some pin-holes left behind.
Driver Side Fender Patch Cleaned
 Though still needing fine tuning, it pretty much is good to go for welding. The fender repair panel was used many many times to verify that it will all join nicely once it is put on. Careful planning at this point is critical. It's easy to redo now, later, it's a pain.
Passenger Side Fender Patch
 As you can see from the picture, much more of this side was missing. The PO had simply grabbed a handful of bondo and stuffed it into the rusting hole. I misjudged how much was needed and will have to form another patch to fit into that grove to make up the difference.
Passenger Side Fender Patch cleaned
 I cleaned up a bit more after this picture was taken. I will definitely need to back the repair with bondo to fill in little holes to prevent it from rusting more. All rust was brushed away until I got to shiny metal and then it was primed. Again, the replacement panel was used to ensure a good tight fit.
 While I love pop rivets for their simplicity, I am well aware that they are definitely not a permanent attachment in this case. At this point I am starting to procrastinate again to avoid the welding aspect, under the hope that my work will get the guy to start the welding job...

No comments:
Post a Comment