Wednesday, April 21, 2010

Headlight V2.0

Headlights are a focal point on this car, as I have said before. The second headlight went quite a bit better than the first, though with it's own set of minor issues.

Retaining Ring

Designed to hold the large light in place, they are pretty well abused. Dirty, painted, and rusted. The paint was chipped off, the dirt scrubbed off, the rust brushed off. The entire piece was polished, and the rust areas were resprayed with silver paint in loo of re-chroming or replacement. I taped off the area to be sprayed on this one, though after the fact I prefer the free spray and polishing off the excess than taping off the area...

Adjuster Before and After

The primary function of this piece is to be able to adjust where the lights are pointing. Cleaning this piece left most unsatisfying results. The rusted area was pitted and generally abused by the fact that there was no dust ring seal to keep water from accumulating on it. The paint was chipped off as usual. The rusted area was treated with several rounds of brushing, vinegar, rinse and repeat. This one was in worse condition than the first.

After cleaning, I spray-painted the adjuster with the lovely silver paint. It looks simply fabulous, I even pooled the excess spray in the rusted out areas and ended up with a smooth finish. Then I placed it down on slightly sticky paint and messed the finish on the bottom. It's not seen and will not mess with the protection provided by the paint.

Front
Back
The base was not nearly as bad as the other one. After chipping off all the icky paint, I was left with primer over the original black, with the original black visible in most areas. I scuffed up the finish to prepare for spray-paint, and taped up the wires so as not to get them black. The first coat on both sides went on even, nice and clean.

Final Assembly
Overall the final assembly looks really a lot better than the original condition. The time spent on the second headlight took significantly less time than anticipated. I am happy with the final products!

Friday, April 16, 2010

Floorboards

What a mess! When I got the car, the floorboards were in pretty rough shape, but not so much so that it's worth replacing. Most of the worst was held behind soundproofing material made of what looked like foil covered plastic bubble wrap. I think this helped keep moisture that found its way below firmly in place.

Drivers Side

Passenger Side

Original Condition:

On removing the soundproofing, the resulting condition was worrisome. A lot of surface rust, flaked off paint, and cracks. On closer inspection, it really wasn't all that bad and needed a lot of TLC to bring back to a usable condition.

Stage 1 Hand Brush:

A heavy hand brush was used to rough out the worst of the flaked paint a heavy duty rust. I used compressed air to blow out the remains until I found I had more rust dust than anticipated and moved to a shop vac to suck the remains out.

Stage 2 Air Brush:

The first wire cup I used was old and worn out. It got quite a bit of stuff off but wasn't very effective on the finer rust areas. I moved to a new wire cup, and it really got after the rust accumulation. The cup is too big to get into the tight corners though...

Stage 3 Air Wheel:

I used a wire wheel to attack the stubborn parts resisting the cup, and the edges the cup couldn't touch. I was able to get most of the worst off. There remains cracks in the metal that I will try and weld over, and hopefully paint the entirety with rust encapsulator.

Drivers Side
Passenger Side
Original Condition:

The soundproofing was already removed on the front floor-pan, deep surface rust is what is on what is poorly installed replacement pans. The metal is definitely solid though.

Stage 1 Hand Brush:

A heavy hand brush was used, but didn't even phase the rust, so I immediately moved to stage 2.

Stage 2 Air Brush:

The wire cup didn't really do to much to it either. The rust just simply doesn't want to come off.

Stage 3 Air Wheel:

I used a wire wheel to attack the stubborn parts resisting the cup. I was able to get some of the rust off. I probably will attach it with the wheel a few more times before sealing the thing.

Wednesday, April 14, 2010

Trunk work

Trunk Before
The trunk is in relatively good condition, but has suffered from loose items in the trunk chipping at the paint. One major rust areas is generally located along the low point where the boot valence joins the boot floor-pan. The other rust area is on the other side of the floor-pan, between the wheel-wells. Generally, it is surface rust only and work was done to remove this rust.

First Pass

Though the picture is very funky, this is what was the results of the first pass. The rust was attacked first with an air drill (pneumatic drill) with a wire cup. It did pretty well at removing the bulk of the surface rust...


First Pass Problem


The seam between the boot valence and the boot floor-pan simply resisted getting at by the wire cup and the valence is pretty beat up with chips, dents, rust and other loveliness.


First Pass Trunk


Overall, the trunk looks to be in pretty rough shape without being too bad. I plan to cover most areas in the trunk with vinyl for the back and two sides, and padded carpet for the floorboards. I don't yet know what I will be doing with the inside of the back valence yet. It's taken a beating.


The problem corner areas were worked over with a wire wheel, getting the last of the bad rust out. I have since cleaned the trunk with soap and water and a little engine cleaner to degrease. I plan to re-spray the trunk area black after priming and maybe a rust encapsulator to at least preserve it.


Monday, April 12, 2010

Dents, dings and repairs.

Surprisingly enough, this car has had little body work over the years. From what I've seen so far, the rocker panels may or may not have been replaced before. The welding of the front of them seems to be a little messy and not ground down. It may have been that way from the factory...

(Pictures to be covered in a future post)

The front floor panels have been repaired, well sorta. The replacement panels were dropped in from the top, cut to be able to fit, then screwed in place from the top. They tried to seal with silicone the seams and void from underneath...

(Pictures to be covered in a future post)

The spoiler has had repairs, missing some of the trailing line, and has a missing support bracket that was snapped off.

Spoiler (hint, look to the left)


The bonnet has bondo repairs, seemingly well done, but is plainly viewable from inside the engine compartment. It's well hidden but if you're a contortion artist, you can see the bondo streamers coming through the drill holes used to pull out the dent. At least it was pulled out and not crafted with 3/4 inch of bondo.

Bondo location from the outside...

The rear valiance has been dinged up pretty much across the back. Dents in both bumper mounts, to the right side, and the worst under the license plate, where it was dented in about 1/2 inch.

Several dents needing work

Before Hammer and Dolly work
Hammer and Dolly produces results. Carefully pounding from the inside with the Dolly on the outside, I was able to smooth out the metal close to where it needs to be. Pound pound pound, check for shape with hands, reset aim and repeat. This area will be re-examined at paint but it's pretty darn close to being back in shape. The pounding did bring out my first, through and though, rust pinhole though...

After Hammer and Dolly work

Tuesday, April 6, 2010

Lets get the party started...NOT

With a nice full day to play on the car I decided to attempt to start the car. Having just enough stuff to attempt it, I eased my way through the work. This is the work I fear the most and have little experience with. But regardless, you have to start somewhere...

Battery


This is my new battery from AutoZone. I simply refuse to buy from Wal-Mart unless they win and I HAVE to buy there. I hooked up the battery (having taped up all the unterminated connections I created removing the lights) and left it for 5 minutes to see if Lord Lucas would let the brown smoke out of the wires. Then only hook it up for testing purposes.

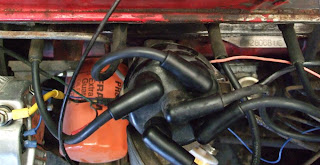
Distributor
Each wire was individually removed from the distributor and cleaned and replaced before cleaning the next. The connections look really good and all the wires are nice and supple.

Spark Plugs

Each Spark plug was removed and examined. I don't really know what I'm looking for but they tell me you have to examine them. Go figure. With each plug removed, a bit of Marvel Mystery Oil was poured into the block. Being that I am pretty sneaky, a drinking straw (new of course) was used to put the fluid in the recessed holes for the spark plugs. A simple finger over the top sorta holds the fluid in the straw and pulling off the finger lets the fluid loose. Well that was the idea. Apparently Mystery Oil drips out the straw pretty easily regardless of what you do but I got it in there...

Champion RN11Yc4 Spark Plug

One of the four of the spark plugs are of this type.

BPR5ES NGK Spark Plug

Three of the four of the spark plugs are of this type.

SU Carbs


On the Carbs, I removed the air filters and hosed the entire assembly down with Carb Cleaner. I intended to have to probably have to access the carbs so I left it this way...

Fuel Pump
I had bolted on the fuel pump and the fuel filter the trip before and when all was ready, I had a fuel line into a 2.5 gal gas can. I hooked up the battery and was ready. I, believing whatever my brother said about not needing a key for the car, confidently grabbed a screwdriver and turned the ignition switch. The engine sprang to life, valiantly trying to start. After a few glory turns, I re-examined the engine. No gas was sucked into the fuel filter. Drat. I removed the fuel pump and opened the top. Inside, it seemed quite fouled with this white powdery stuff. I cleaned it out of the top cavity and re-mounted it. Again, no suckie. I removed it again and opened the lower cavity and it too was full of the white junk. I cleaned it out as best I could and the diaphragm seemed intact.

No Fuel Pump


My buddy suggested soaking the entire thing in parts cleaner, so we did that. The stuff looked like evil drug out of the depts of the earth and simply smelt foul. After soaking for the recommended 30 minutes, I hosed it off with Carb Cleaner and re-assembled. It actually seemed to push air on operating it this time... Re-installed, I put the gas can on the tire to help.


Fuel Filter


On the left is the new fuel filter, without gas, on the right is sorta filled with gas. After cleaning the pump, I tried starting it again. It sucked enough to halfway fill the fuel filter, but it seems not to be pumping enough... I will try and replace it with the other fuel pump.

Engine


This is how I left the engine. Valiantly trying to spring to life but without the gas, it can't. I'm very please with the engine actually moving. Will live to battle this another day!

Monday, April 5, 2010

Tina's Toy

Visiting my brother for Easter was fun and interesting, par for the course. On arrival at my brother's house, a little early as usual, they were not home. I organized the box o' parts my dad offered to strip and readied my gift for Belle, err well, my brother (Rock Guards for Belle's Headlights). I decided to explore a bit as my brother ALWAYS has some new or interesting automotive toy after I've been gone so long.

I rounded the corner and really was overcome with shock and horror! My first impression from the rear was that my brother bought a Volkswagen Beetle. I quickly realized it wasn't a VW and quickly bought myself to a better state of mind.


After looking it over, I was sure that there was some mistake and this was a joke to play on my parents. The rust made me shiver, though it was solid, it had bad rust along the doors, the hood, a few dents and jury-rigged parts. The interior looked OK, needing carpet, headliner, and basic cleaning. Two of the curved side glasses were damaged. No matter what my brother paid for this car, it was too much unless this sucker was historic.


Tina arrived and informed me that it was hers, glad I didn't say too much before. I put on my difficult face and expounded on it's extensive rust issues. She informed me that it was a "Barn Find" and the price was right, FREE! After finding out is was free, it all cleared up. She found the car in a barn, and when querying the owner, they wanted to get rid of it, but it cost $175 to have it towed to a junkyard. She loves the cars of that era and wants to try her hand at metalwork and body repair. It's really a cute car and would be perfect to practice body repair.

1961 Volvo VT544


All in all, it should be fun for her to play with! Replacement parts are going to be interesting but all in all, if they don't spend much on it it should provide a pleasant diversion.

Easter Dinner was delicious as usual and I truly enjoyed my visit as I always do.

Headlight

Headlights are a focal point on this car, and from the look of them, they needed a lot of work. On removing the chrome rings, I was presented with the horror of bad painting! The red of the car was painted onto chrome, and onto the base. This is simply sloppy quick work to get the most bang for the painting time. I simply cannot abide by this concept. If your going to do it, do it right.

Retaining Ring


Designed to hold the large light in place, they are pretty well abused. Dirty, painted, and rusted. The paint was chipped off, the dirt scrubbed off, the rust brushed off. The entire piece was polished, and the rust areas were resprayed with silver paint in loo of re-chroming or replacement. Overall, I'm pretty happy with the results.

Adjuster


The primary function of this piece is to be able to adjust where the lights are pointing. Cleaning this piece left most unsatisfying results. The rusted area was pitted and generally abused by the fact that there was no dust ring seal to keep water from accumulating on it. The paint was chipped off as usual. The rusted area was treated with several rounds of brushing, vinegar, rinse and repeat.

Base


What can I say, this piece took most of my time spent on the assembly. The red paint was chipped off, the rust brushed, the wires cleaned, the piece cleaned and it still looked like a worn dog.

Completed Adjuster


After cleaning, I spray-painted the adjuster with a lovely Silver paint. Other than a few runs, it looks simply fabulous. Considering what I had to work with, this piece came out looking good and should hold up to the weather of another 40 years!

Completed Base


The base was a nightmare. After chipping off all the ugly paint, I was left with primer over the original black, with the original black visible in most areas. I scuffed up the finish to prepare for spray-paint, and taped up the wires so as not to get them black. The first coat on both sides went on even, nice and clean. The only visible defect was a spot that the paint hadn't gone on as thick and you could see the defects underneath. I sprayed another layor of paint on it and to my horror, a section the size of a grapefruit crinkled up in a horrible looking orange-peel. I tried to sand it down and re-spray but it repeated the problem in the same area. I eventually took it back to the original condition, scraping off all the new paint and re-spraying. I can still see a few of the marks left by the sanding but as this will be under the bonnet, I'm not going any further on it.

Final Assembly


Overall the final assembly looks really a lot better than the original condition. I am going to have to spend alot of time on the other side as it is in similar condition. I am happy with the final product!

Thursday, April 1, 2010

It's all about the date!

Finally, the project has sped up. The metalwork was much easier than anticipated and looks just fine. The respray is complete and the paint job is just simply gorgeous! I couldn't have picked a better color.

We had problems with the engine that was in the car so I found someone with a 350HP crate motor he didn't need and I got it for a song. Mounting the engine was a little tricky and we had to cut the bonnet. Thankfully it all went pretty smooth and we got it purring in no time. I was in much too much of a hurry to wait and I just put one of the seats back in. Man does that sucker MOVE.

My interior's delivery has been delayed but it should be here in a day or so. I decided to replace all the interior with leather and suede. The color isn't quite what I had envisioned, being a light shade of green, but I got it at a great price. I think of it as a tribute to the original color of the car.

I took the car out on the road and boy does it get looks. The engine sorta shakes the car when idling and the metal flakes in the paint job really brings out the purple in the paint. I really wish I had pictures but it moved so fast I simply forgot.


And if you believe any of that foolishness, Happy April Fools Day! Real updates to follow.